Domo is where your church lives in an orderly way: people, groups, events and pastoral care, all in one place. This tour shows you the essentials so you feel at home from day one.
The first thing you see: Home
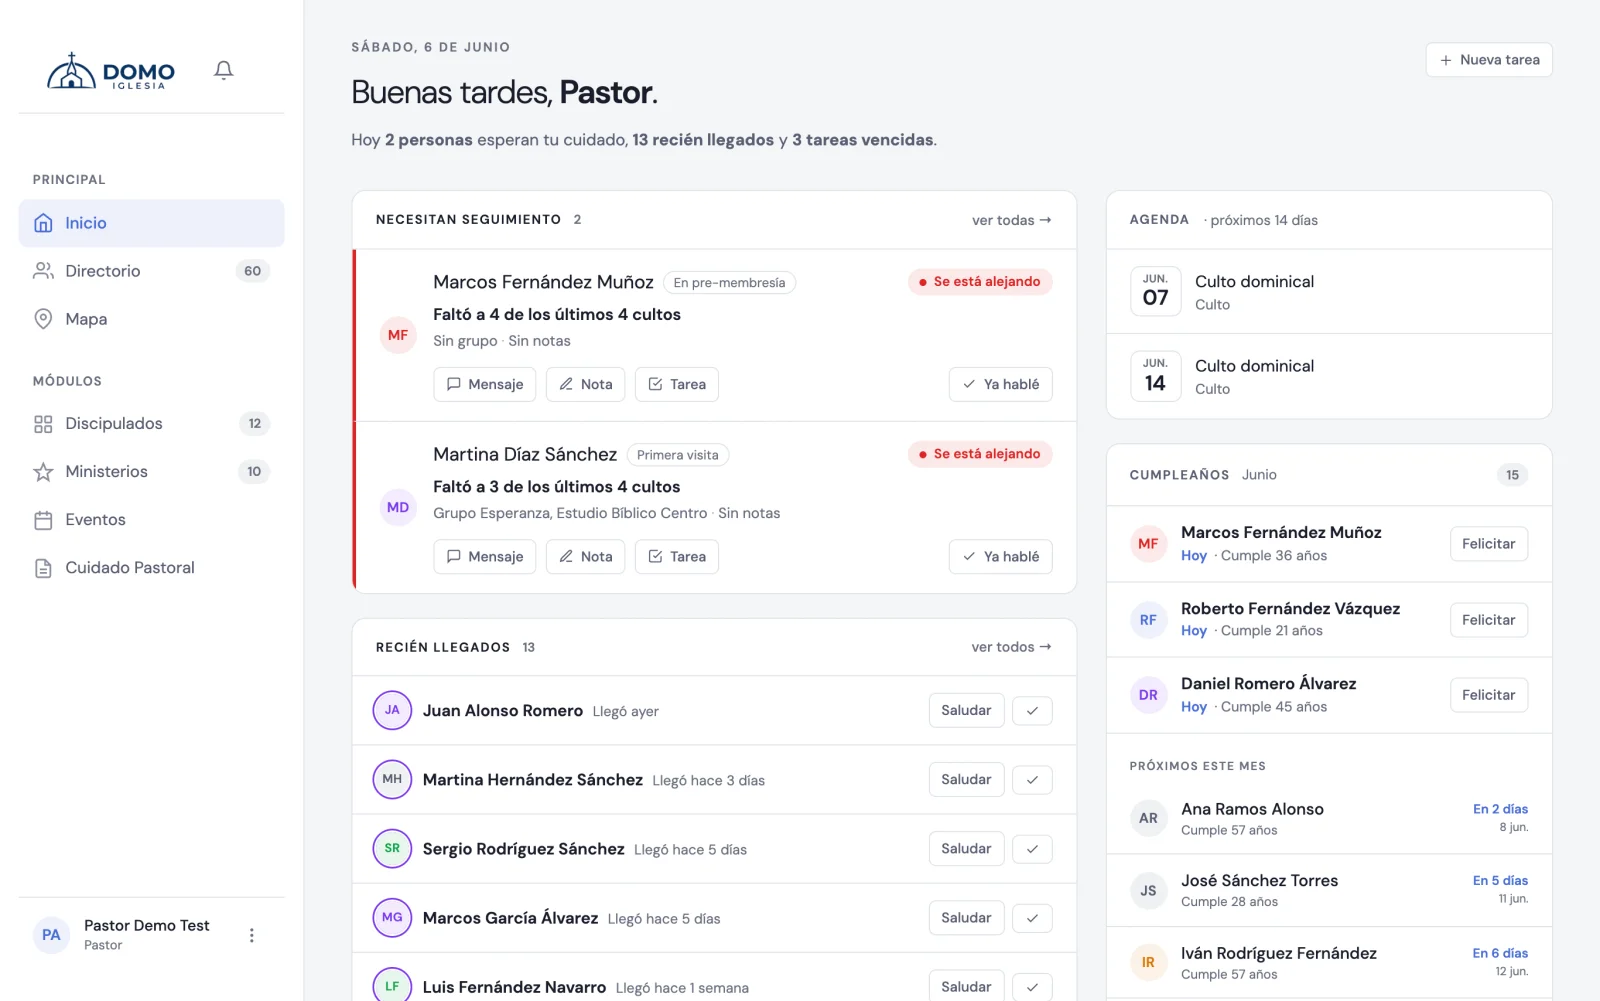
When you sign in, you land on Home. Think of it as your church's dashboard: it shows a summary of what's happening and a "Need follow-up" section that gathers the people who haven't attended in a while, so you know who to reach out to this week.
You don't have to set up anything to get started. As you add people and activity, Home fills in on its own.
The side menu
Everything in Domo is reached from the menu on the left. These are the main sections:
- Directory — everyone in your church.
- Map — where your community lives.
- Discipleships — your small groups and cell groups.
- Ministries — the church's serving teams.
- Events — meetings, services and activities.
- Pastoral Care — care notes and follow-up.
You won't always see every section: the menu adapts to your role. For example, Pastoral Care only shows for those who have access to it. Also, an administrator can rename some sections from settings, so in your church they might be called something different.
Where settings live
The administration options —Users, Roles and permissions and Settings— aren't in the side menu. You'll find them at the bottom left: click your name (or the three-dots icon) and the settings menu opens.
Your space is yours alone
Your church's information is private and only your team sees it. From Users you can create accounts for other leaders and decide what each one can see and do based on their role.
What now?
We recommend going in this order:
- Create accounts for your team.
- Add your first people to the directory.
- Create your first discipleship or event.
When you're ready, continue with the next guide: Create your team's accounts.