Before inviting your team or adding people, you need to create your church's space in Domo. It's free to get started and takes a few minutes.
Start the sign-up
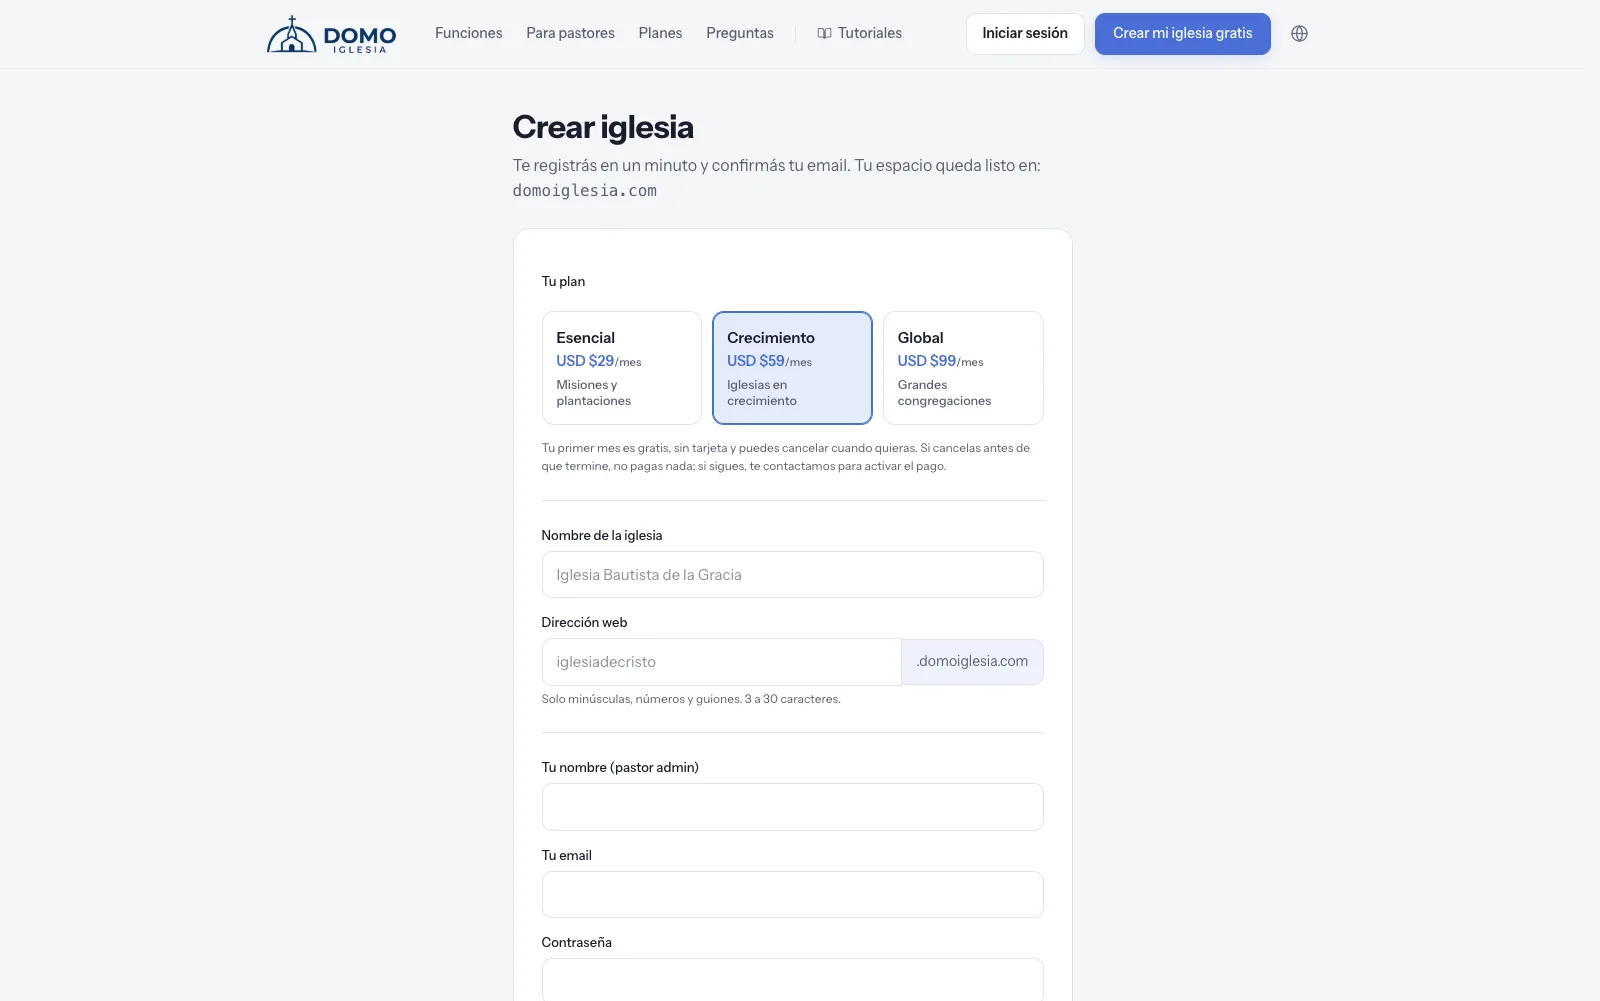
Go to domoiglesia.com and click Create my church for free. A form opens where you set:
- Your church's name — how you want it to appear in your space.
- Web address (short name) — your church's subdomain, for example
yourchurch.domoiglesia.com. Domo tells you instantly if that name is available or already taken. - Your name and your email — you'll be the first administrator account.
- Your password — at least 8 characters.
- Plan — you can choose it now; either way you start with the first month free to try everything with no limits.
To continue, you accept the Terms and the Privacy Policy (the checkbox is required).
Verify your email
When you submit the form, nothing is created yet: Domo sends a verification link to your email. You'll see a screen asking you to check your email; if it doesn't arrive, you can resend it from there. The link is valid for 48 hours.
Don't see the email? Check your spam folder. Your church's space is only created once you click that link.
Ready to sign in
When you confirm your email, Domo creates your space and shows you a success screen with your church's address and your sign-in email. From there you can already log in.
Next step
With your church created, learn how to sign in and get around: How to sign in to your church.